Wednesday, 14 December 2022

Loopty Loop

Hi Loves, 

Tis the season for giving and for that reason, I would like to share this easy cross-body bag pattern with you.  I know this post is not like any I've done before in terms of writing style but as we grow as individuals I would like to grow as a blogger.

In this blog, I am going to provide you with the full details of the written pattern which is quite easy for you to follow, as well as the yarn type etc.

I do hope you love this bag as much as I did.  The yarn was one carried by Ice Yarns, though the colour I used is out of stock there are still a few colours you could choose from.  This bag is completely customizable so you could also use just about any yarn you like.  The size would then be different.

As promised here is the full written pattern.


Yarn Information:

Ice Yarn Woolfine in the colour Gold fnt2-58305


1 ball

Fiber Content: 50% Wool, 50% Acrylic

Weight: 50 gr. / 1.76 oz. per ball

Length: 350 m. / 382 yds. per ball

Yarn Thickness: 2 Fine: Sport, Baby


You will need to know how to do the loop stitch which is quite easy. There are also many easy-to-follow videos on YouTube. I used one skein but held 2 strands together for the bag. The pattern is done in one piece then folded and joined in the side and base to make the bag.

Loop stitch – insert your hook as you would to sc, loop the yarn over your finger and stretch it to the length you desire. Put the hook under both strands of yarn and pull both through the stitch. Yarn over and pull through the loops on the hook. 


Abbreviation:

sc – single crochet

sl st – slip stitch

ch – chain

hdc – half double crochet


The bag is 7′ without the loops and strap, 9′ with the loops, 30′ with strap un-stretched… 34; when strap is stretched (when loaded).


Pattern:

Chain 61.

row 1: sc in the 2nd ch from hook and in all stitch.

row 2: 1 loop stitch in all stitch 

Repeat rows 1-2  5 times for a total of 12 rows. 


Next step:

sc in each stitch for a total of 30 rows.


Construction:


Fold your piece in half with the right side on the inside. Ensure all your loops are inside. Start at the top of the bag slip stitch along the side and base. For re-enforcement sc from the base, along the side back to the top of the bag. Turn your bag back on the right side.


Strap... Option A:

Cut the yarn after you finish sewing the side and base.  Attach the yarn in any stitch on the side... sc in 6 stitches ensuring you have 3 on either side.

ch 1, turn, sc in each stitch (6 sc) - repeat for the length of your straps.


Or 


Option B: After sewing up your bag, do not fasten off.

Sc in 3 stitches from where the yarn is connected... Ch 1 turn sc in the 3 stitches you just made, then hdc in the next 3 stitches (this will ensure it levels out) 

ch 1, turn, sc in each stitch (6 sc).  repeat for the length of your straps.

Ensure the strap is not twisted once you have achieved your desired length. Connect to the other side of your bag using your desired method.


For closure, I attached my yarn to the centre of the opening on one side of the bag,  chain 15, sc in the 6th chain from the hook(buttonhole made) and in every chain back to the middle of the bag. Fasten off and hide the yarn tail. Sew a button a few rows down from the opening on the other side of the bag.  Feel free to close your bag however you like.


If you do make this bag please tag me on Instagram, Facebook, Ravelry and Twitter.   


Thanks love for taking a read.  Live, Love, Laugh... Until next time.

Sunday, 18 September 2022

Slayed

 Hi loves,


Man oh man how long has it been????? A while... I know. 

Well you see 2018, was the last time I made dolls for Things Jamaica πŸ‡―πŸ‡², they haven't reached out to me and neither have I.

2019 came and gone, then there was that year we all wish never came.  2021 came with a glimmer of hope and I thought... Wait!!!  I should make contact as I'm sure a few items were outstanding for me still.

The question was asked are you still in operation? My answer was yes. They placed an order, their biggest one yet.  I was really happy about this as I haven't been in the creative mood for a while and this got the juices flowing.

I gave an estimate of a month for the completion. The first week sees me moving at lightning ⚡ speed (you would have thought I was related to Usain Bolt, 🀣🀣🀣). Then comes motherhood, school work, housework, and my 9-5 among other things and my month deadline was fast approaching and I was nowhere near completion 😭😭😭😭...

I would be lying if I say I wasn't worried... Thankfully it wasn't a hard and fast deadline so a week or so over the month they were all finished.

Packaged and ready to be delivered.  I was pressed for time,  as I was working late into the night with work the next morning, I forgot to take the finished product picture of the keychains.

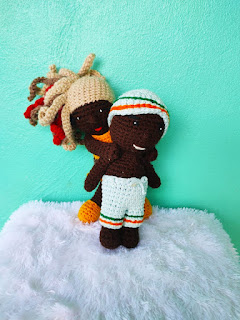
So loves without further ado here are my beauties in all their glory😁😁😁😁.


The gents are out


Missy heading to the mall.

Little black dress

Me and my girlsπŸ’ƒ 

Moesha and Chip date night.

Sam and Nikki

Ahm. Can you just take the pic already

Grammy's ready.

These  2 love birds

Oops. It's just a little leg lift.

"Looking into my eyes, tell me what you see"

Almost done

90% finished

We're coming on quite nicely, aren't we?

Squeak!  squeak!


The last doll to be made and I'm honestly in love with the outcome... The way the beret sits on the side of the head... The braids to the side... This girl slayed.

Looking at the picture, justice isn't being served.  Oh, how I wish you all could see them in person.

Bye until next time.

Thanks love for taking a read.  Live, Love, Laugh... Please follow me on FB, Instagram, and Twitter


Sunday, 11 September 2022

Ripples and Waves

 Hi Loves, 


I was allowed to design something using Ice Yarns Softly Baby.  I had no clue what type of yarn it was, how it felt, was it easy or hard to work with.  Nothing, I knew absolutely nothing about this yarn, so when my package arrived and I ripped it open, I was in utter awe.  The yarn felt so soft. My girls even agreed.

They started placing orders as to what they both wanted me to make from the yarn.  I had to remind them of the task at hand, lol.

I decided to design a baby blanket, one that a beginner could do as well.  I first went to stitchfiddle.com to ensure what was in my head looked good on paper.    With that aspect completed and looking as I thought it would.  I wrote the steps down (as it did not transfer to the written pattern automatically with the basic option) and then I gather my supplies.

Needle.... ✔

Yarn.....✔

Pattern....✔

Though simplistic it may seem, if I didn't have the above tool to show what the finished product would look like.  Man, I would have had a foggy 🐸🐸🐸🐸 farm before the item even get midway.  

I worked on my blanket, took pictures, and upload my design to Ice yarn.  What's next? 🀷‍♀️ ....................... I don't know.

So I folded my blanket, and store it away.  Fast ward a few months I heard friends of mine were having their first child... I decided to gift the blanket along with a hat as my baby gift.  

Was wondering if they didn't want the gift as they were taking a mighty long time to retrieve it... But was overjoyed when the dad finally picked it up, and the mom messages me squealing about how she loved them.  I was beaming with pride😁😁😁😁

These are moments to live for as a creator/designer ( in the making) 🀭🀭🀭🀭..giggles!!!

You can make your very own Slanted ridges.  Go ahead try it and give me your feedback. 


Thanks love for taking a read.  Live, Love, Laugh... Please follow me on FB, Instagram, and Twitter.


Friday, 25 March 2022

Just saying πŸ‘‹


Hi loves, 

Wow, it's been ages... Just stopping by to say hi...  

I have been trying to juggle work, motherhood, family life, and the whole shebang.  Can't say I have been doing a good job but I have been giving it my best, working in the shadows.

Drafts gathering dust and all...

Just regrouping to come back stronger.  In the meantime feel free to follow me on FB, Instagram, and Twitter

Until next time... Live, laugh, and love.❤❤❤

Tuesday, 11 May 2021

Half Double crochet

Hi loves, 


Today we will be doing the Half Double Crochet (hdc).  This stitch is taller than the single crochet but shorter than the double crochet, hence the name half double crochet.  It is also a slightly dense stitch that is good for clothing like skirts and shorts.  Your projects work up faster than doing single crochets.  There is much to be said about the half double crochet but without further ado, let's learn how to do the HDC so we can start making beautiful pieces.

How Is It Done?

To do the HDC you would begin as you would for the double crochet by yarning over before inserting your hook into the desired stitch.  Then this is where the difference takes place.  With three loops on your hook, you yarn over and pull through all three loops and there you have it, one hdc completed.  Easy as pie don't you think?

You are a visual learner

No issues there... Let's get some visuals for you.


The finished swatch

not so close up.

Yarn over (yo)

Insert your hook into the stitch. Yo, pull up a loop (3 loops on hook)

Yo and pull through all 3 loops on the hook


Having issues with my pictures.  Hope my video will help.

Hdc on a current WIP

Hdc from the starting chain.

I would like to hear from you.  Let me know what you think in the comments.  Until next time.....


Thanks loves for taking a read.  Live, Love, Laugh... Please follow me on FB, InstagramTwitter. You can also purchase yarn to make your masterpieces here.


Monday, 26 April 2021

Air Shine

Hi Loves,

      Here I was browsing the web, looking at different yarns when I saw this beautiful yarn called Air Shine.  I ordered the green and waited..... and waited...


4 weeks later..... 

My yarn came, I ogled over the way it looked and felt, but didn't know what to make with it.  A few months pass and still no idea what to use my Air Shine for, then Petra Breakstone decided she was having another "anything Petra KAL".

I thought to myself πŸ€”πŸ€”πŸ€”, Rayne, wouldn't that look elegant in the Air Shine.

@petrabreakstone's Rayne

I cast on and within 3 days completed my shawl and my oh my, it looked absolutely beautiful.  It was that beautiful that it was claimed before it was completed.  I didn't get a chance to really photograph the finished product.


The night I finish my shawl
pics not doing it justice.

a closeup

The happy Customer. She contributed the photos.


Thanks loves for taking a read.  Live, Love, Laugh... Please follow me on FB, InstagramTwitter. You can also purchase yarn to make your masterpieces here.

Monday, 12 April 2021

Speaking It Into Reality.

 Hi loves, 


Have you ever wondered why something keeps affixed to your imagination or dreams?  I have.

I've dreamt many years ago of owning my own Beauty Salon which was operated as a classy beauty salon, with an actual start and end time. This last bit (opening hours) was very important, as at that time I was working in a hair salon that did not have an end time.  I would go to work by 9am and in comes someone after 3 pm requesting to get their hair braided small (if you have ever gotten your hair braided with extensions you know it takes time).  Once my boss accepts this client it means I could be at work until after midnight and still have to be back at work by 9 am the next morning.  That was exhausting and to say the least, I wasn't getting a lot of pay.

Fast forward a couple of years I got certified in general Cosmetology but right after completing tragedy struck and I was forced to seek employment fast as the sole breadwinner at the time died and my baby was just about to turn 2 years old.  While working at my new job I continued to do natural hairstyles (my specialty).  This was my second job, my weekend job, but a little over a year I had to change department and this caused me to lose clients as  I started working on weekends.  I stayed in that job changing departments and moving up the ranks until 2017 when I got laid off.  This is when my dream of becoming my own boss came to life, though not as a salon owner.

I've always been creative at heart, whether it's creating beautiful hairstyles, crocheting/knitting, or embroidering... So it came as no surprise when I registered the business name Khenzuri's Treasures.  I was really pumped up about sewing my seeds and getting my name out there.  But it's not that easy.  

My daughter's first day of school hairstyle

A simple twist with beads


I did my own hair as well

crochet braids


crochet then twist out

I've had good days and some not-so-good days but that doesn't stop me from believing that I will succeed.  I know I will not just own a successful business where I crochet and knit other people's designs... But I will become a designer as well... 


How are you so confident you will become a designer?

I am sure because no matter what pattern I am making my mind is racing 100 miles a sec with new ideas of what to make or how to change the current pattern I am working on. I have designed things in the past it's just not written for others to remake and that is what I am working on.

For instance, I made a dress from a scarf I test knitted.  While I was knitting the scarf, the idea came to turn it into a crop halter top.  However, after starting the new project that idea shifted and became a dress. Can I tell you how this dress stayed on my mannequin for almost a year before the final touches were added?  Take a look and tell me what you think.  Did I do well? 

My design, it was birthed from a scarf I test knitted for Petra Breakstone.

The issue I have now as to why I am not actively pursuing this part of my dream is designing takes time and I am a bit stretched at the moment but the stars are being aligned as we speak so it's just a matter of time.

And you know as long as there is life a dream can still become a reality.  Come along with me on my journey.  Until next time.


Thanks loves for taking a read.  Live, Love, Laugh... Please follow me on FB, InstagramTwitter. You can also purchase yarn to make your masterpieces here.


Monday, 29 March 2021

Double Crochet (dc)

 Hi again loves, 


Thank you for sticking around.  Today I would like to teach you double crochet (dc).  This will be done using American terminology.

This stitch is not as dense as the single crochet (sc).  It works up quickly and is perfect for blankets, scarves 🧣, and dishcloths just to name a few.

To do this stitch you make your foundation chain, however long you need it to be for your project...

I'll be doing a chain of 18 stitches.

chain of 18 sts.

To do the double crochet, yarn over (yo) and inserts your hook in the 4th chain from the hook... Yarn over and pull up a loop. Yarn over and pull through two of the three loops on the hook. Yarn over and pull through both remaining loops. There, you have just completed a dc.


We have 4 dc and 3 chains.

3 hooks on the hook


In this pic we yo and pull through 2 of the 3 loops

This picture is showing the completed stitch.


I also have a video for my loves. 


Thanks loves for taking a read.  Live, Love, Laugh... Please follow me on FB, Instagram, and Twitter. You can also purchase yarn to make your masterpieces here.


Monday, 15 March 2021

Designer... Well I'm getting there

 Hi Loves,


I have always been able to make my "own designs", be it a bag or a skirt, or even a suit for my firstborn (sadly I gave it away without thinking when she grew it out). I could also replicate without writing down the steps, but as time goes by the thought came to share my designs. This is where things get difficult, as it's easy for me to do but to write the steps down now that's a whole other ballgame.

Why you ask? 

Well, I can write down what I do, but will it makes sense to my readers?  Will they be able to reproduce the awesomeness I did?

Here are a few bags I made using no pattern...


SO......

In my quest to become a renowned designer...  I am testing the waters with what I think are easy-to-follow patterns, ones with simple repeats to make beautiful pieces. In January 2019 I wrote and publish my first pattern on Ravelry (wow, it's been that long).  I still haven't sold a single copy but not worried.  I have written notes here and there of different items I want to design but nothing final.

There are a few setbacks since my first publication however, I will press on and persevere.  I have grown and I'm more confident in writing my patterns.  I am also gathering the skills needed to ensure the patterns are well-written and formatted.


My first publication.


So look out world Khenzuri is coming!!  Stay tuned as a lot of awesomeness is to follow.  Until then... 

Thanks loves for taking a read.  Live, Love, Laugh... Please follow me on FB, Instagram, and Twitter. You can also purchase yarn to make your masterpieces here.


Let's Go To The Beach

  Hi Loves,  It's great to share my love for creating and always having a work-in-progress on hand. Having a hobby that brings me joy an...