Showing posts with label cute. Show all posts

Monday 23 January 2023

Ari's Purse

 Hi loves, 


Happy New year to you. I would love to wish you all a wonderful and prosperous 2023, filled with good health, wealth, happiness and all your hearts desires.  On January 18, 2023, I was browsing YouTube and found a very easy to follow tutorial of a cute purse.  I watched the entire video and decided, hmmm I am going to make my little girl one.

I usually don't pay much attention to the type of yarn and sometimes the needle size.  I just use what I have and make modifications where necessary, and this time was no different.  I had this yarn , I unfortunately don't know the brand as it was a completed item I was asked to unravel to make something for my daughter's god mother, she however did not give me the go ahead and she has since past.  

I did the number of chains the pattern required but since the yarn and needle were different, my piece was small so I doubled the number of stitches. It was quiet an easy pattern to follow, I was in the rhythm minutes after starting.  After completing the number of rows she did, I decided to do another repeat which gave me the size that would be perfect for my 2 year old.

This was the amount she did.

This is what I did.

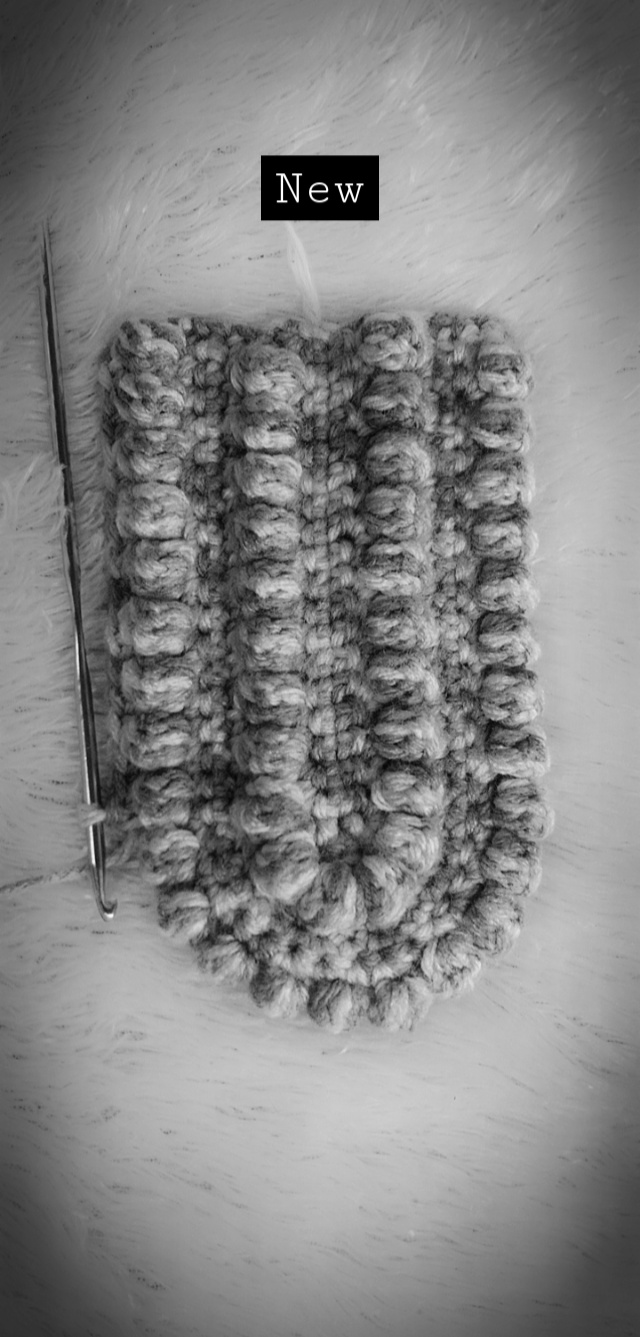
With the front being completed, I went and did the back panel.  Can you believe I modified the pattern to my liking and almost forgot what I did (😀😁😂😃😄).   I did another modification to the pattern by joining my pieces together then did the strap separately.  I did a 6 stitch knitted I-cord strap, attached my strap and cleaned the edge of the bag up, add a button and closure. My bag was all done. This took me 2 days to complete.  It would have been done in 2-3 hours but mama had a ton of things doing in between.  The straps took the longest if I'm being honest. 

@ACraftyConcept how did I do with my version of your cute bag?

I took a few pictures of the bag and also of her wearing it.  She loved in instantly.  I was however instructed to take other pictures to post by my eldest, so that's what I did.  Side note, I normally get  some form of opposition to enter the shower (then to get out) but all I had to say was; "Lets shower to take pics with your bag".

 
Trying to close it.

Do you all see that leg? Baby know how to pose.


Can you tell that she loves her new bag?  I didn't attached the tassels because I was ordered by her sister to make another and wanted to ensure I had enough of the yarn to do so.  I was given some specific instructions to follow when doing the 2nd bag:

"Mommy can you make me one as well, but make it so my phone and other things can go in it!" "And it needs to go across my body, like so (demonstrating with her hands)".  So loves look out for the sequel.  

Lets be friends, follow me on InstagramFacebookRavelryTwitter and TikTok   Check out my Etsy page as well.  New items to be added.

Thanks love for taking a read.  LiveLoveLaugh... Until next time. Khenzuri


Wednesday 14 December 2022

Loopty Loop

Hi Loves, 

Tis the season for giving and for that reason, I would like to share this easy cross-body bag pattern with you.  I know this post is not like any I've done before in terms of writing style but as we grow as individuals I would like to grow as a blogger.

In this blog, I am going to provide you with the full details of the written pattern which is quite easy for you to follow, as well as the yarn type etc.

I do hope you love this bag as much as I did.  The yarn was one carried by Ice Yarns, though the colour I used is out of stock there are still a few colours you could choose from.  This bag is completely customizable so you could also use just about any yarn you like.  The size would then be different.

As promised here is the full written pattern.


Yarn Information:

Ice Yarn Woolfine in the colour Gold fnt2-58305


1 ball

Fiber Content: 50% Wool, 50% Acrylic

Weight: 50 gr. / 1.76 oz. per ball

Length: 350 m. / 382 yds. per ball

Yarn Thickness: 2 Fine: Sport, Baby


You will need to know how to do the loop stitch which is quite easy. There are also many easy-to-follow videos on YouTube. I used one skein but held 2 strands together for the bag. The pattern is done in one piece then folded and joined in the side and base to make the bag.

Loop stitch – insert your hook as you would to sc, loop the yarn over your finger and stretch it to the length you desire. Put the hook under both strands of yarn and pull both through the stitch. Yarn over and pull through the loops on the hook. 


Abbreviation:

sc – single crochet

sl st – slip stitch

ch – chain

hdc – half double crochet


The bag is 7′ without the loops and strap, 9′ with the loops, 30′ with strap un-stretched… 34; when strap is stretched (when loaded).


Pattern:

Chain 61.

row 1: sc in the 2nd ch from hook and in all stitch.

row 2: 1 loop stitch in all stitch 

Repeat rows 1-2  5 times for a total of 12 rows. 


Next step:

sc in each stitch for a total of 30 rows.


Construction:


Fold your piece in half with the right side on the inside. Ensure all your loops are inside. Start at the top of the bag slip stitch along the side and base. For re-enforcement sc from the base, along the side back to the top of the bag. Turn your bag back on the right side.


Strap... Option A:

Cut the yarn after you finish sewing the side and base.  Attach the yarn in any stitch on the side... sc in 6 stitches ensuring you have 3 on either side.

ch 1, turn, sc in each stitch (6 sc) - repeat for the length of your straps.


Or 


Option B: After sewing up your bag, do not fasten off.

Sc in 3 stitches from where the yarn is connected... Ch 1 turn sc in the 3 stitches you just made, then hdc in the next 3 stitches (this will ensure it levels out) 

ch 1, turn, sc in each stitch (6 sc).  repeat for the length of your straps.

Ensure the strap is not twisted once you have achieved your desired length. Connect to the other side of your bag using your desired method.


For closure, I attached my yarn to the centre of the opening on one side of the bag,  chain 15, sc in the 6th chain from the hook(buttonhole made) and in every chain back to the middle of the bag. Fasten off and hide the yarn tail. Sew a button a few rows down from the opening on the other side of the bag.  Feel free to close your bag however you like.


If you do make this bag please tag me on Instagram, Facebook, Ravelry and Twitter.   


Thanks love for taking a read.  Live, Love, Laugh... Until next time.

Monday 26 April 2021

Air Shine

Hi Loves,

      Here I was browsing the web, looking at different yarns when I saw this beautiful yarn called Air Shine.  I ordered the green and waited..... and waited...


4 weeks later..... 

My yarn came, I ogled over the way it looked and felt, but didn't know what to make with it.  A few months pass and still no idea what to use my Air Shine for, then Petra Breakstone decided she was having another "anything Petra KAL".

I thought to myself 🤔🤔🤔, Rayne, wouldn't that look elegant in the Air Shine.

@petrabreakstone's Rayne

I cast on and within 3 days completed my shawl and my oh my, it looked absolutely beautiful.  It was that beautiful that it was claimed before it was completed.  I didn't get a chance to really photograph the finished product.


The night I finish my shawl
pics not doing it justice.

a closeup

The happy Customer. She contributed the photos.


Thanks loves for taking a read.  Live, Love, Laugh... Please follow me on FB, InstagramTwitter. You can also purchase yarn to make your masterpieces here.

Monday 12 April 2021

Speaking It Into Reality.

 Hi loves, 


Have you ever wondered why something keeps affixed to your imagination or dreams?  I have.

I've dreamt many years ago of owning my own Beauty Salon which was operated as a classy beauty salon, with an actual start and end time. This last bit (opening hours) was very important, as at that time I was working in a hair salon that did not have an end time.  I would go to work by 9am and in comes someone after 3 pm requesting to get their hair braided small (if you have ever gotten your hair braided with extensions you know it takes time).  Once my boss accepts this client it means I could be at work until after midnight and still have to be back at work by 9 am the next morning.  That was exhausting and to say the least, I wasn't getting a lot of pay.

Fast forward a couple of years I got certified in general Cosmetology but right after completing tragedy struck and I was forced to seek employment fast as the sole breadwinner at the time died and my baby was just about to turn 2 years old.  While working at my new job I continued to do natural hairstyles (my specialty).  This was my second job, my weekend job, but a little over a year I had to change department and this caused me to lose clients as  I started working on weekends.  I stayed in that job changing departments and moving up the ranks until 2017 when I got laid off.  This is when my dream of becoming my own boss came to life, though not as a salon owner.

I've always been creative at heart, whether it's creating beautiful hairstyles, crocheting/knitting, or embroidering... So it came as no surprise when I registered the business name Khenzuri's Treasures.  I was really pumped up about sewing my seeds and getting my name out there.  But it's not that easy.  

My daughter's first day of school hairstyle

A simple twist with beads


I did my own hair as well

crochet braids


crochet then twist out

I've had good days and some not-so-good days but that doesn't stop me from believing that I will succeed.  I know I will not just own a successful business where I crochet and knit other people's designs... But I will become a designer as well... 


How are you so confident you will become a designer?

I am sure because no matter what pattern I am making my mind is racing 100 miles a sec with new ideas of what to make or how to change the current pattern I am working on. I have designed things in the past it's just not written for others to remake and that is what I am working on.

For instance, I made a dress from a scarf I test knitted.  While I was knitting the scarf, the idea came to turn it into a crop halter top.  However, after starting the new project that idea shifted and became a dress. Can I tell you how this dress stayed on my mannequin for almost a year before the final touches were added?  Take a look and tell me what you think.  Did I do well? 

My design, it was birthed from a scarf I test knitted for Petra Breakstone.

The issue I have now as to why I am not actively pursuing this part of my dream is designing takes time and I am a bit stretched at the moment but the stars are being aligned as we speak so it's just a matter of time.

And you know as long as there is life a dream can still become a reality.  Come along with me on my journey.  Until next time.


Thanks loves for taking a read.  Live, Love, Laugh... Please follow me on FB, InstagramTwitter. You can also purchase yarn to make your masterpieces here.


Monday 1 March 2021

Spiderweb

 Hi loves, 


2021 started with a challenge presented to me by my mother.  She sent me a pic and requested the item for her birthday in February.  I was like wait a minute mama, I have never just looked at a pic and replicated it... I was about to back down but told myself this year, I will definitely step out of my comfort zone and really try to get my business off the ground as this is what I really love doing.

This is what she sent me.

I honestly went searching on the net for a possible pattern.  I typed in the search engine what I think this may be called... I search for images, I checked the page on Facebook, where she got it from, and no such luck. 

She then made another request....... Lady are you serious right now????   I am still trying to locate a pattern for your requested top.  You see, that item was made out of yarn but she hates yarn as she thinks all yarn is scratchy (trust me. I've tried telling her otherwise).  So, she wanted her's made out of crochet thread, you know that thin thread they used for doilies.

Yeah, that's the one... Aunt Lydia's size 10.. yup.. this same one.

On a side note, before you tell me there is one that was made for fashion (Aunt Lydia's Fashion 3, that's thicker), I found that out recently, but not available where I live.

Now back to the scheduled programming.....

I had to decide:

  • How many chains I needed to do to get her size (which when asked for her bust measurement she replied... "measure yourself and add about 4")
  • For the spacing how many stitches to skip etc.
With my picture, thread, and hook in hand I started to replicate... 

I also decided to hold 2 strands instead of two.  After working out how many chain stitches were needed. I started the easy part... Double crocheting the top section.

Now...... Here comes the hard part.... How am I going to start the design without a pattern now? Sighs!!!   Well, I did a thing.... It looked almost like the picture, but when I got to the end of the first round... Sighs again!!! there were too many stitches left, which means the last stitch will be too wide.. 

Aaaawwww!!!!

ok Melissa, think...... I counted the last stitches.. and did a little math and just perfect... I got equal spacing.. 

Working, working, working.. Crocheting, crocheting, crocheting... not feeling what I'm doing... Pause! Pause! Pause!

I finally got to the desired length... But something was off... Bummer!!!!!!!

This is what it looked like.

I wasn't feeling this look... then I did a thing... I slip-stitched the last row and felt that it looked better.. If you know me... I could not leave the others so I ripped back all the stitches back to the beginning of the pattern.  OMG, you say... That was easy to do... It's what followed next.. I did each round twice... 

What? How so?... Well after completing each round I do through each stitch and slip stitch around. That, in my opinion, thickens the strands and it looked better to me.  Let me know what you all think.


The end product.


Thanks loves for taking a read.  Live, Love, Laugh... Please follow me on FB, Instagram, and Twitter. You can also purchase yarn to make your masterpieces here.


Monday 22 February 2021

Christening Dress

 
Hi loves,

I have wonderful news, on December 22, 2020, I welcome the newest member of my family, a sweet little bundle of joy..... Princess Ari.  I'm not sure if you guys notice whenever I do anything for babies I'm always happy and inspiration is never far (hmm.... Is this my tell-tale sign of what my true calling is?  Who knows? guess we'll just have to wait and see).

Well as I said earlier inspiration is never far...  and therefore I decided she would need a christening dress and I would love to make it for her.  I went to Youtube, browsed around, and came upon a very cute and simple design by Majovel.  I watched the video (see attached video below) and then decided to start crocheting the dress.


Princess Ari was on the smaller size but due to the fact that I wouldn't be using the same yarn or the same size needle as in the video, I decided to do the largest size.  

Let's get started shall we - I did a chain of 62 using a size 2.75 mm crochet hook and Ice Yarns Natural Cotton in white.


After 2 rounds

 Round 3 completed

5 rounds completed

Making steady progress

Stitch markers in place, let's start the body of the dress.

Dress completed as per video (thread still attached, was deciding my next move) 

After completing the dress, I was left with the decision of what embellishment to use.  I thought ribbon, so I went and purchased a pretty neon pink (the choices sadly were either neon pink or really dark pink).  I wanted rose buds but the store had none. I came home to weave the ribbon through the neck, though pretty I felt something was missing.  

I consulted my daughter Sani and she too agreed it needed something else.  It wasn't until the headband was made the finishing touches came to life.  Now, there was no need for that ribbon I bought as I crochet the band needed as well as add a little colour to the sleeves and hem of the dress.  Presto my masterpiece was finito.

Too anxious to wait until the sun was out.

Doesn't she look cute

My camera does them both no justice


Thanks loves for taking a read.  Live, Love, Laugh... Please follow me on FB, Instagram, and Twitter. You can also purchase yarn to make your masterpieces here.


Foundation Single Crochet

Hi Loves We will be learning about the Foundation Single Crochet (FSC) stitch today.  This stitch has you completing the chain and single cr...